THE GRINDSTONE – A BACKCOUNTRY ELK HUNT

Nine trail cameras set and pulled, 5 1/2 days of pre-season scouting, 78 bulls glassed up and the search for something worthy of my long awaited tag continued. As a hunter I’ve really only ever known one way of finding success, and that’s simply outworking other hunters and putting a lot of time into hunts. So far this one was shaping up to be similar to many hunts over the years, work hard, work harder, and hopefully turn up something that gets your heart going. If I’m being honest, this challenge is what keeps me coming back. Hunting is hard and when you start trying to find the most mature animals in your area the odds only stack harder against you.

Jordan and I crested the last ridge just as daybreak was spilling across the giant flat in front of us. Down below us I immediately spotted elk as the wind ripped at our backs and jostled our glass. One look and I knew a closer look was in order. The Leica was soon clipped into the tripod and I was looking at the best bull we’d seen yet. I thought I’d seen him two days earlier as I’d finished pulling cams before restocking but he was a long ways off. Now we were a 1000 yards out and he looked bigger. Before I could really size him up he slipped down into a ravine with his cows and was gone. We set camp and decided to make a big loop and get a better vantage for the evening. In two days season would open and we wanted to know if this bull was going to be our target or not. That evening we slipped into 300 yards of the bull and his cows. The wind was screaming and the elk were between us and our tents so close proximity was necessary. I also wanted a close look.
After studying him for over an hour I was unsure if he was the one. Now in MT I would shoot this bull but I’d waited 12 years to draw this tag and the unit has produced some giants over the years. This is the interesting part about draw tags. You have to equip yourself with a whole new set of standards and expectations that aren’t your norm. Doing that brings a lot of questions and uncertainty into the picture. At the end of it we decided this bull was a high 330s bull or low 340s, a damn nice bull. That said, if you want to kill 350+ bulls you need to be able to pass damn nice bulls. At the end of the day this bull didn’t scream “hell yes” when I looked at him. I knew what could be living in this unit and I had a long season in front of me with a rifle in hand. I was going to roll the dice on this one and put the work in to see if I could find a bigger bull in the unit.
Opening day had come and gone and we had now looked over 135 bulls not including the photos on my trail cam. Lots of 290-320 bulls seemed to be the norm. It was fun hunting, my brother Travis behind the camera and Jordan Blase with me helping look over animals and gameplan our approach to hunting the unit. We were having fun but warm weather and high winds seemed to be keeping elk movement minimal and hunter pressure was high in the corner of the unit that seemed to be holding the majority of the elk. We decided to pull camp and continue on in search of less pressure and hopefully a big, old bull that was hiding out in more remote country.
Days later we’d managed to call in two small bulls and had covered a lot of ground. From glassing to sneaking timber to calling, we’d been working hard to locate elk of any kind. What had held a lot of elk just months earlier now felt as if aliens had sucked all the wildlife from the area. With warm temps and wind consistent in the forecast I called the first hunt after 10 days of solid effort. We’d see if we could get a change in weather and come back. I still had over 20 days in the season so we had time to see if more favorable conditions might show up.
Over the following weeks I made two more trips to my unit. One of those with my good friend and avid elk hunter Brandon Purcell and the other with my roommate Logan Summers. We continued to see nice bulls but nothing that was noticeably larger or had any real “wow” factor to them. At this point I wondered if there were any bigger bulls.
Maps were poured over, ideas thrown around, but at the end of the day I decided to end my hunt by going back to where we’d seen the majority of bulls and spend 4 days re-hunting those zones. The final push would just be me and my brother Travis. We’ve killed a lot of elk together over the years so hopefully this trip would be no different.
After about 5 and a half miles and 4000’ of vert we hit our camp spot. Snow had moved in and looked as if was going to hang around for a while. We saw four small bulls that night so we knew elk were in the area. The following morning broke with light snows and we moved to our first glassing point. The same bulls from the previous night casually grazed as snow filtered in and out. Quickly we felt that if the weather was going to hold we should circle the mountain to the west and look at some of the harder to reach areas. After an hour of hiking we caught a 20 minute window of visibility before the weather rolled in. For the next seven hours we stoked the fire, ate snacks and tried to glass anytime we got a small window of visibility. In the end we saw zero elk and a handful of mule deer does that appeared to be slowly moving to new country. With just two days left I banked on the clearing weather and cold to have bulls up on their feet in the am.
The following morning we left the tents an hour before first light. It was single digit cold and I didn’t want to sweat much as we climbed the 500’ to our glassing knob. We hit the top just as light was starting to filter across the frosty landscape. We donned puffy gear and got behind the glass. I quickly spotted two bulls on a small finger of grass above cliffs, a spot I’d highlighted on the maps before I ever stepped foot in the unit. This was the first time I’d seen bulls here but one had a heavy rack and his thirds extended outside the beams on both sides. I liked him but he wasn’t an immediate hell yes. We kept scanning and over the course of the morning saw a total of 31 bulls. I was able to relocate the original big bull that I’d passed on trying to kill at the very start of the hunt. He was with three other bulls, one of which I only caught a glimpse of his tops. I knew they were worthy of a play but we’d need to move camp closer to them. As the bulls slowly filtered into the timber the first bull of the day still lived rent free. Was he hiding length in his mass? Did I need to just get a closer look before we moved on? As I started hiking back towards the tent I could see where the first two bulls were at. In my binos I could see one of the bulls, the smaller of the two. They were about 1800 yards out and something just pulled at me to go take a closer look. It would only be a half out detour and so I told Travis were going down there to have a closer look. Fifteen minutes later I crept up to the edge and peered across the canyon. Immediately I spotted the bull I’d come to see. He was laying in the open but behind a tree which is why I couldn’t see him coming down off the mountain. He was a beauty. Not the size and score of what I dreamed this hunt would provide, but a heavy, gorgeous bull living in country that exemplified the ruggedness of the unit. In my heart I quickly knew this was the one. I’d expended a lot of energy to find something world class and although the score sheet wouldn’t show it, this bull in this moment was world class.
After telling Travis, we quickly got setup to take a shot. The wind was light, just a 4-6mph breeze and I knew it had the likelihood of picking up. At just over 500 yards I knew my skills could deliver a lethal shot with high probability. I got behind the gun, picked my spot, confirmed my wind call and slowly pressed the trigger. The shot broke clean and I saw my bullet hammer through the front shoulder. The bull stood up holding his front leg, wobbled, and then fell over backwards into the snow. Twenty one days in and my tag was filled. We soaked in the beauty of the morning, the sun shining into the snow covered canyon, fog slowly rising through the jagged cut below us.
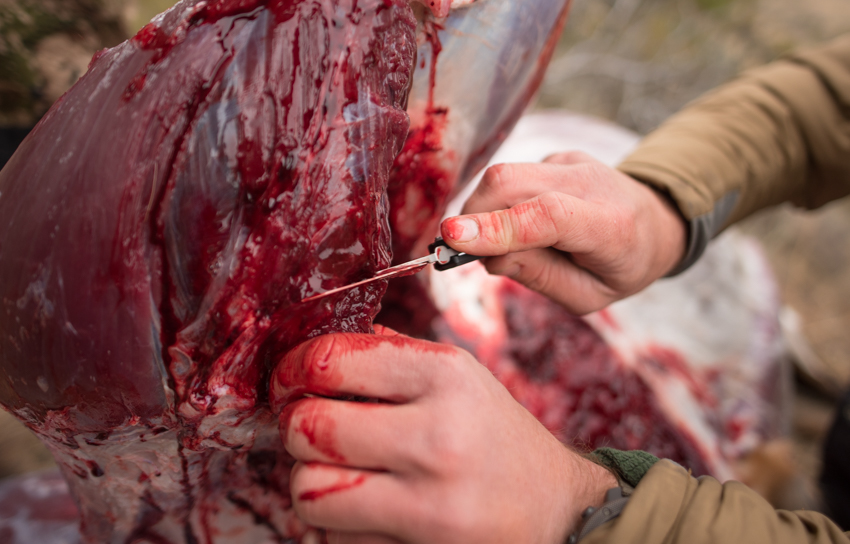
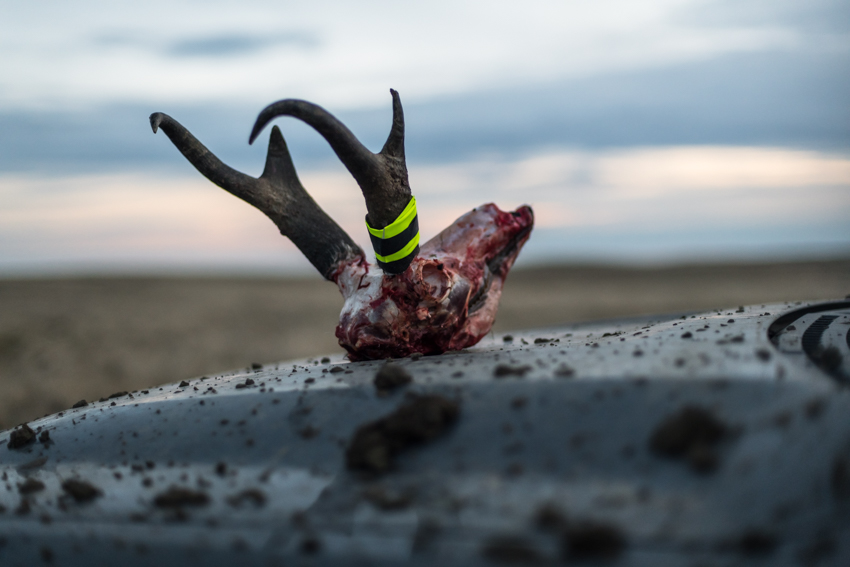
An hour later we’d circled the canyon and made it to my bull. He was just a pretty up close. We took some photos and video and proceeded to begin the process of cutting him up and creating a gameplan for getting the meat off the mountain. We were in griz country so we knew having a solid plan would help us get all the meat home safely. That night we moved two hind quarters up to a tree that we would use as a rendezvous point with some help that would come in the next day to help pull the whole bull off the mountain.
The next morning we woke up early to go get the last two quarters, backstraps and head. The wind was ripping and the temps were in the twenties. Hands barely worked as we strapped meat into our packs and prepared for the hike up to camp. After an hour of hiking we hit our meat tree and were able to get the entire bull in one spot. We hustled to camp so we could break down our tent and get all of our gear into our packs. We were lucky to have some exceptional friends come up the mountain that morning to help pack the bull off the mountain. Jordan, Caleb, and Chylo all showed up and after some chit chat around the fire we began the process of dividing up the bull and putting it into packs. After three hours of solid hiking we finally hit the truck. We were all tired but happy to be at a lower elevation, sipping a cold beer, and laughing amongst ourselves. It had been a hell of a hunt. I’d given it my all and was rewarded with an experience that will never fade.
Words: Zack Boughton (@zackboughton)
Photos: Travis Boughton (@tjboughton)